Aseptic Transfer
In this lab exercise, you will learn to transfer microbiological cultures from one medium to a second, sterile medium without contamination of the culture, sterile medium, or the surroundings. Why is this important?
In exercise 2-1, you learned that microorganisms thrive pretty much everywhere. It is far too easy to contaminate your lab tests with stray organisms from the air, the countertop, or your tools. It is also possible to expose your surroundings or yourself to a possible pathogen.
Certain techniques are necessary when handling organisms, tubed media, plated media, and inoculating tools such as loops, needles, or swabs. Using these techniques to maintain aseptic conditions is a process known as "aseptic technique."
What is “aseptic technique”? What does the word “septic” mean? Aseptic technique is a means of performing lab work that greatly reduces the risk of contamination.
Refer to your laboratory text for various methods of transferring microbial cultures; it and your instructor will give you a solid foundation from which you may learn the techniques. Practice, however, is the only way to master such manipulations.
|
|
Notes and Tips
1. Be sure you are wearing the appropriate personal protective equipment (PPE) before you begin working in the lab. If you are unsure what PPE you need to wear, ask your instructor.
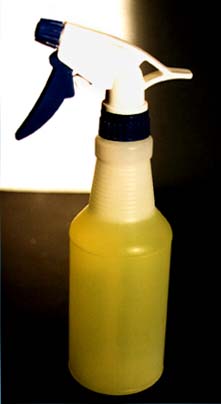
2. Disinfect your working area with the 10% Lysol provided at your table.
3. Gather all the necessary materials (bacterial stock culture, growth media, bunsen burner, transfer tools, Sharpie) before you begin.
4. Label the tubes and/or plates you will be inoculating with the following:
your name or initials
your instructor's name
the date
the type of medium it is
the name of the organism
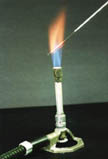
5. Properly adjust the flame of the bunsen burner. The proper flame is a small blue cone; it is not a large plume, nor is it orange.
6. Flame your loop (or needle) from the end of the handle (the end nearest the tip, not the end you're holding) to the tip of the loop. Be sure that each segment of metal glows orange before you move the next segment into the flame. Be careful; the metal will get hot.
7. Once you have flamed your loop (or needle), do not lay it down, blow on it, touch it with your fingers, or touch it to any surface other than your inoculum or the sterile media. If you do touch the tip to another surface or blow on it, you will have to re-flame the loop before you proceed with your inoculation.
8. Allow your loop or needle to cool before you try to pick up your organism. If you pick up organism with a hot tool, your cells will be killed. To cool your loop or needle quickly, place it on a section of agar that is uninoculated or is at least different from the area from which you will pull cells.
9. Ensure that you are transferring the correct organism into your labeled tube by double-checking the name of the organism on the stock culture from which you are collecting your inoculum.
10. When removing the caps from tubes, always keep the caps in your hand. Never set them on the table, as they could pick up contaminants. Your instructor can show you how.
11. Always handle open tubes at an angle; never let them point directly up, as airborne or other environmental organisms could fall into the tube and cause contamination. Also, keep the lids of plates over the plate when streaking, as this will help prevent environmental contamination of the plate.
12. Always flame the lip of a culture tube when you open it and before you replace the cap.
13. As soon as you are done inoculating, flame your loop or needle. Never place a contaminated tool on your workbench.
14. Always tape your inoculated plates together and incubate them upside down . This will help prevent contamination and aid in the formation of isolated colonies.
15. Discard contaminated materials properly; return your supplies to the proper storage locations, and clean up your mess!
16. Always disinfect your work area with 10% Lysol when you are finished.


